Below is a comprehensive documentation on how to effectively use the Amelia Online Booking System to manage customers and appointments offered by Blue Potato. If you do not have the Amelia Online Booking System integrated with your website and would wish to learn more feel free to contact a member of the Blue Potato Team.
1.0 Getting Started
1.1 Logging into your website
- Visit https://YOURURL.com/wp-admin or https://YOURURL.comwp-admin/admin.php?page=wpamelia-dashboard#/dashboard
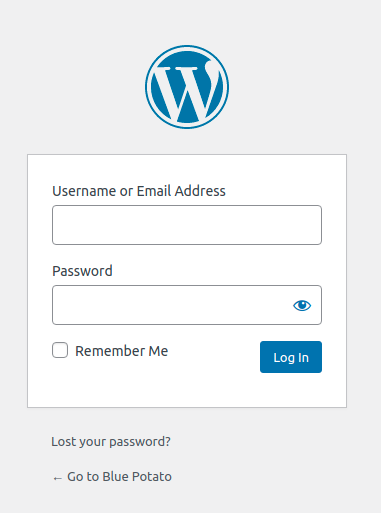
- Enter your Username and Password and click ‘Remember Me’ then click ‘Login’
- If you do not see the Amelia Online Booking Dashboard by default select the Amelia option from the menu on the left

2.0 Managing Bookings
2.1 Creating Bookings
There are 2 ways appointments can be created in your online booking system,
- Through the front-end by a cutomer: Here, the customer takes the initiative of scheduling an appointment with the website, while you have the option to change the appointment status, reschedule, cancel, or assign another employee.
- Through the back-end by an employee: This approach allows employees to schedule an appointment from the WordPress dashboard.
Creating a appointment through the back-end
- On either the calendar or appointment page click the ‘+ New Appointment’ button or the blue ‘+’

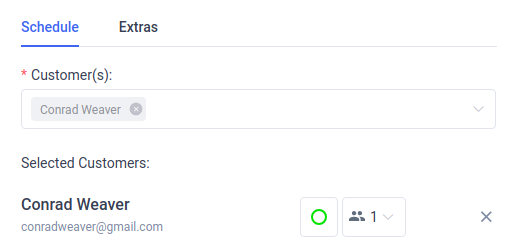
“New Appointment” dialog is divided into two tabs:
- “Schedule”: Use this field that you must populate pane to create a new appointment. “Customer(s)”, “Service”, “Employee”, “Date”, and “Time” are mandatory and you need to populate these fields to schedule a new appointment. There is no specific order in selecting “Customer(s)”, “Service” and “Employee”, but before you can choose the appointment date, you have to populate these three fields. After selecting the date, you will be able to select the time of the appointment:

- “Customer(s)”: Select the customer(s) to whom the service will be provided. If the customer is not an existing customer, click the “Create New” button. The “New Customer” dialog will open and following the following in Section 3.1 Creating Customers to fill out the required information.
- “Service”: Select the service that will be delivered to a customer(s). Once you select the service, it will narrow down to the employee and location options.
- “Employee”: Find and select the employee that you want to provide the appointment.


- “Date”: Select an available appointment date from the date picker. Dates won’t be available until you choose the customer(s), service, and employee. Once you have selected the appointment date, you will be offered available time slots in the “Time” drop-down.
- “Time”: Choose the time of the appointment from the available time slots.
- “Service Category”: While this field is not required it will make it easier for you to select the service by filtering the services of the chosen category.
- “Location”: While this field is not required, it will make it easier for you to select the employees that work in the selected location.
- “Notify the customer(s)”: When this option is checked, a notification that contains the summary information for the booked appointment will be sent after you save this appointment.
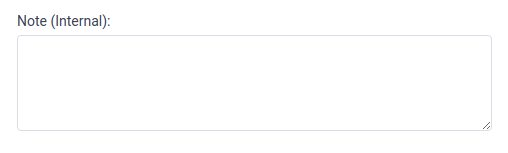
- “Note (internal)”: Here you can write a quick note to pay attention to customer(s) particular needs. This note is internal and is not visible to the customer(s).
Any Notes will only be visible on the specific appointment.


- “Extras”: After completing the information on the first tab navigate to the “Extras” tab to add the additional service extra.
- After Entering all the desired details click the ‘Save’ button on the appointment dialog.


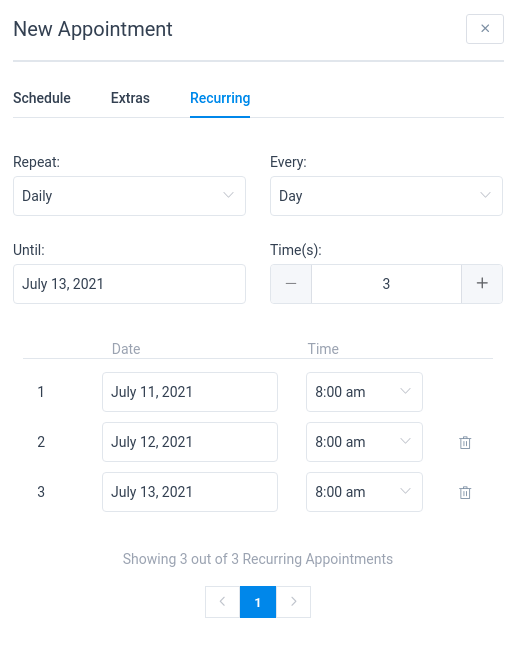
Reoccurring Bookings
The Recurring Appointments feature in your online booking system gives your customers the ability to book an appointment that repeats by choosing the date and the time for the first appointment and then selecting the type of the recurrence and number of repeating all in one booking process.
Booking Reoccuring Appointments (Only for services that have this enabled)
- Create Booking as usual (as in 2.1) and before saving do the following,
- Select the ‘Repeat this appointment’ option which will create a new tab in the appointment dialog box
- Under the ‘Recurring’ fill in the details for the desire reoccurring frequency,
- If required the system will appointments items that have a conflict and need to be rescheduled which can be done by editing the dropdown for date and time,


2.2 Existing Bookings
2.2.1 Calendar View to Access Bookings
2.2.1.1 Opening the Appointment Dialog
- While on the calendar screen, Click the desired appointment, this will open the Appointment Dialog box where you can view and edit existing booking
2.2.2 Appointment View to Access Bookings
2.2.2.1 Opening the Appointment Dialog
- While on the appointment screen, go to the desired appointment and click the edit button beside the appointment. This will open the Appointment Dialog box where you view and edit existing book

2.2.2.2 Filter Appointments
- To show the filter options(if not visible by default) Click the Filter button beside the search bar.

- This will allow you to select filters for following filters for the date range specified,
- Employees
- Customer
- Service
- Status
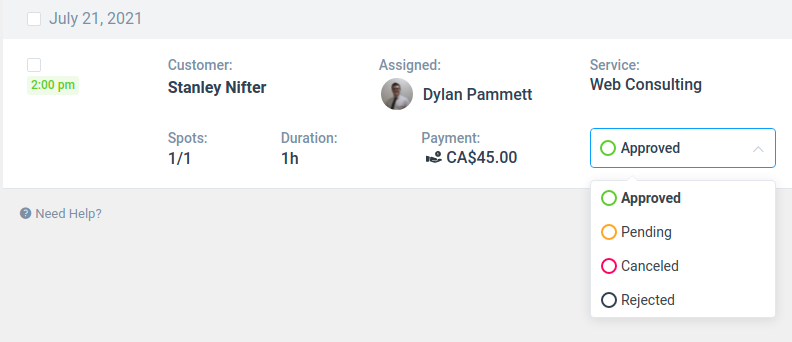
2.2.3 Appointment Bookings Statuses
Statuses indicate if the arrangement is approved, pending, canceled by customers, or rejected by the employees.
Currently, there are 4 statuses:
APPROVED
Approved is for confirmed bookings which if defaulted will immediately notify the customer after the scheduling.
PENDING
Pending status an employee needs to manually approve a booking after it has been scheduled. The appointments can be approved by an employee, and if enable will notify both the employee and customer of the status change.
CANCELED
Cancel status can be set by employees or customers (if enabled) to cancel the appointments through the back-end or Customer Panel respectively. This will notify both the employee and customer of the status change.
REJECTED
The rejected status allows the employee the option to reject pending appointments and if enabled will notify both the employee and customer of the status change.
You have two possibilities for changing appointment statuses: you can change it directly through the appointments page, or you can open the appointments dialog and change the status.
Updating Appointment Status:
- For the first option, navigate to the appointments list

- On an appointment from the list click on the appointment status drop-down and change the status
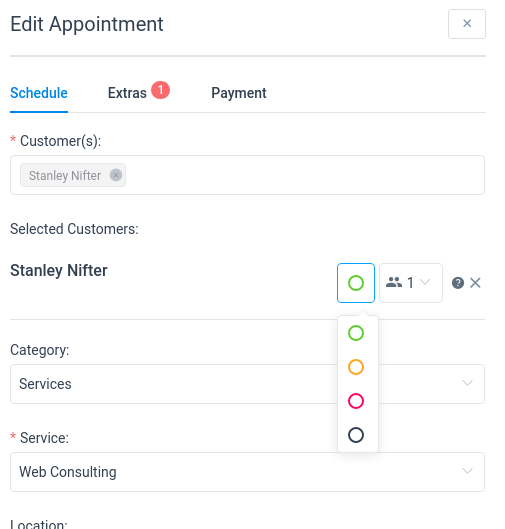
- For the second option Navigate to either the calendar or appointment screens (See Sections 2.2.1 & 2.2.2 respectively)
- Open the Appointment Dialog box. (To Open the appointment dialog on the calendar view see 2.2.1.1 & for the appointment screen see 2.2.2.1)
- In the Appointment, Dialog click on the status button, and you will see a drop-down where you will be able to choose a new status based on colour.
2.2.4 Rescheduling Appointments
- Navigate to either the calendar or appointment screens (See 2.2.1 & 2.2.2)
- Open the Appointment Dialog box. (Open the appointment dialog on the calendar view see 2.2.1.1 & for the appointment screen see 2.2.2.1)
- Select a new date and time in the appointment dialog,
- After Entering all the desired details click the ‘Save’ button on the appointment dialog.
- If configure this will send a notification to both the employee and the customer about their new scheduled time.

2.2.5 Deleting Appointments
- Open the Appointment Dialog box. (To Open the appointment dialog on the calendar view see 2.2.1.1 & for the appointment screen see 2.2.2.1)
- Simply click on the “Trash” icon button and click “Delete” to confirm.

3.0 Managing Customers
3.1 Creating Customers
- To create your first customer, go to the “Customers” page
- Click on the “Add Customer” button or the “+” button on the bottom left side of the page and the “New Customer” Dialog will appear
- Enter Clients Details as required.
- For WordPress User Dropdown Field Leave it blank do not make a selection here
- Any notes entered here will be visible to employees when viewing the customers

- Click the Save button
3.2 Updating Existing Customer Information
- To edit a customer, go to the “Customers” page
- Go to the desired customer and click the edit button to open the client dialog

- Make any desired changes click the Save button
3.3 Deleting Customers
- To deleted customer, go to the “Customers” page
- Go to the desired customer and click the edit button to open the client dialog
- Click the Trash icon in the bottom left of the customer dialog then the confirm delete button

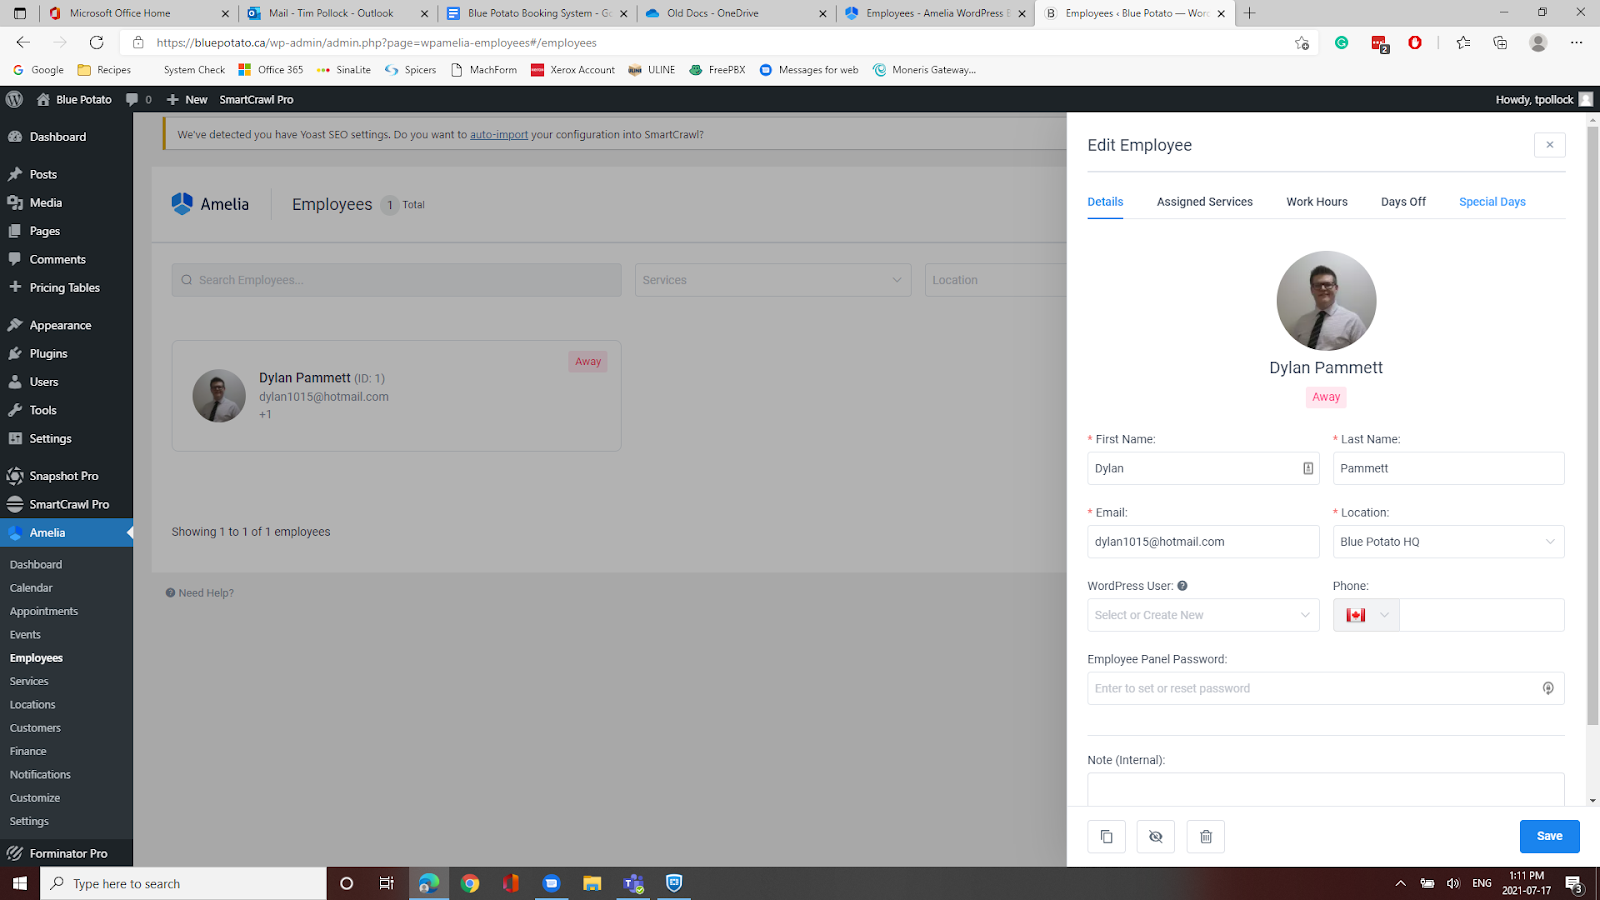
4.0 Managing Employees
4.1 Days Off
Days off are where an employee is scheduled off for an entire day. They will not be available for bookings for those days. This is useful for things like holidays or vacations and can be set to occur once or reoccur each year. To schedule only part of a day off see “Special Days Below”.
To add a day off:
- Select Employees from the Amelia menu

- Click on the employee you want to add a day off for
- The Edit Employee box will open
- Select “Days Off’ on the top menu of the Edit Employee dialog box

- On the Days Off tab you can see any scheduled days off and edit them by clicking the pencil icon next to them or add a new day off by clicking on the + Add Day Off

- When you are done making any changes click “Save” at the bottom right of the edit employee dialog box.
4.2 Special Days
Special days allow you to edit an employee’s hours for a day. This is useful if an employee is not available for part of a scheduled day or is available for additional time on a scheduled or unscheduled day.
To add a day off:
- Select Employees from the Amelia menu

- Click on the employee you want to add a day off for
- The Edit Employee box will open
- Select “Special Days’ on the top menu of the Edit Employee dialog box
- On the Special Days tab you can see any scheduled special days and hours. Edit them by clicking the pencil icon next to them or add a new day off by clicking on the + Add Day Off
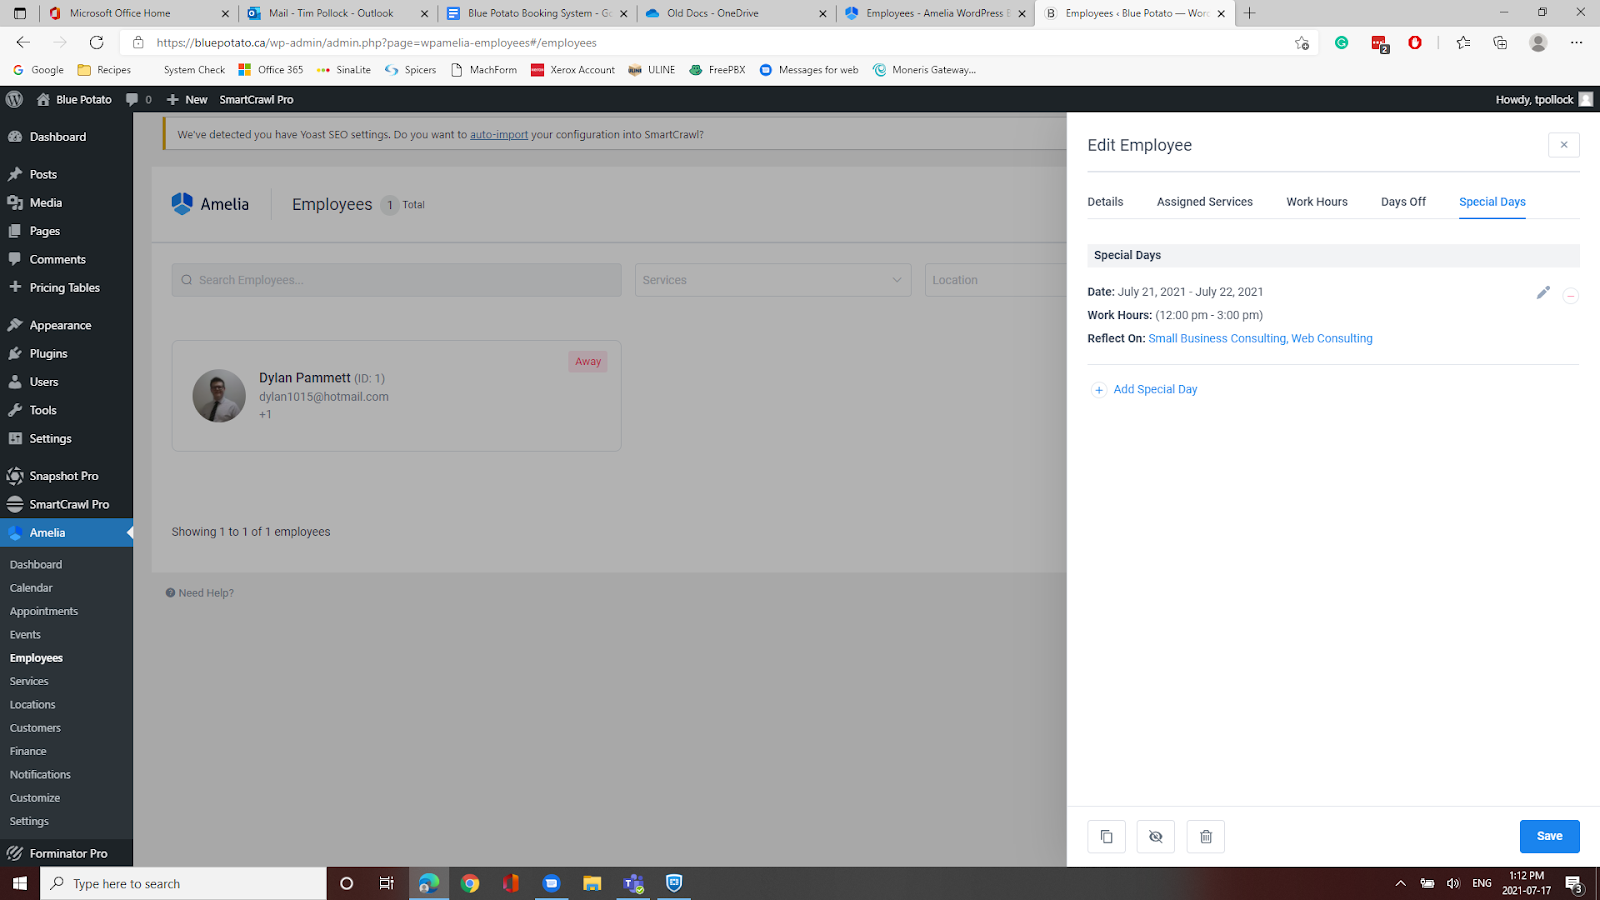
- You can have the special day assignment apply to all services provided or only selected services under the Services setting for each special day. This is useful if a service may not be available for a day (due to maintenance or other reasons) or if you have a special service that is only available for a particular day or time.
5.0 Finances
5.1 Tracking Payments
There are 2 methods for tracking payments within the Amelia Online Booking System. One uses is to use the Fiance/Payments screen and the other is to edit the information within each booking through the Appointment Details Dialog
5.1.1 Track Payments on the Finance Screen
- Navigate to the Fiance and Payments Screen
- Go to the payment you would like to impact and click the details button which will open the payment details dialog


- In the Payment Details Dialog Click the edit button
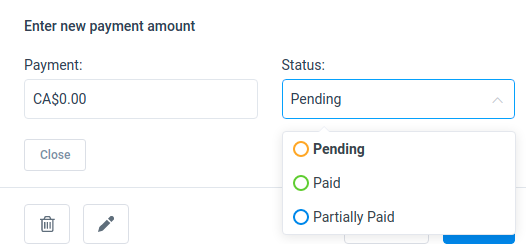
- In the pop-up enter the payment amount and the deserved status,
- Then Click the Save button.
5.1.2 Track Payments Through the Appointment Dialog Screen
- Open the Appointment Dialog (See 2.2.1.1 Calendar View and 2.2.2.1 for Appointment View)
- In the appointment Dialog Navigate to the Payments Tab,
- Once on the payments tab click View Payment Details which will launch the Payment Details Dialog,
- In the Payment Details Dialog Click the edit button
- In the popup enter the payment amount and the deserved status,


Then Click the Save button.
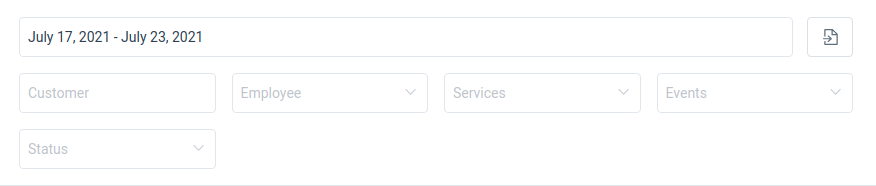
5.2 Filtering Payments
With the filters that appear at the top of the page, you can narrow the appointment results by common characteristics such as date, customer, employee, service, status, or event. The date filter is predefined by the period of seven days starting from the current date but you can change to some other period and the plugin will remember this in all date filters.
To Use Filters on Payments
- Navigate to the Finance and Payments Screen
- Above the Payment details see the filter dropdowns and apply as required.